Apprenticeships
Apprentice Restoration
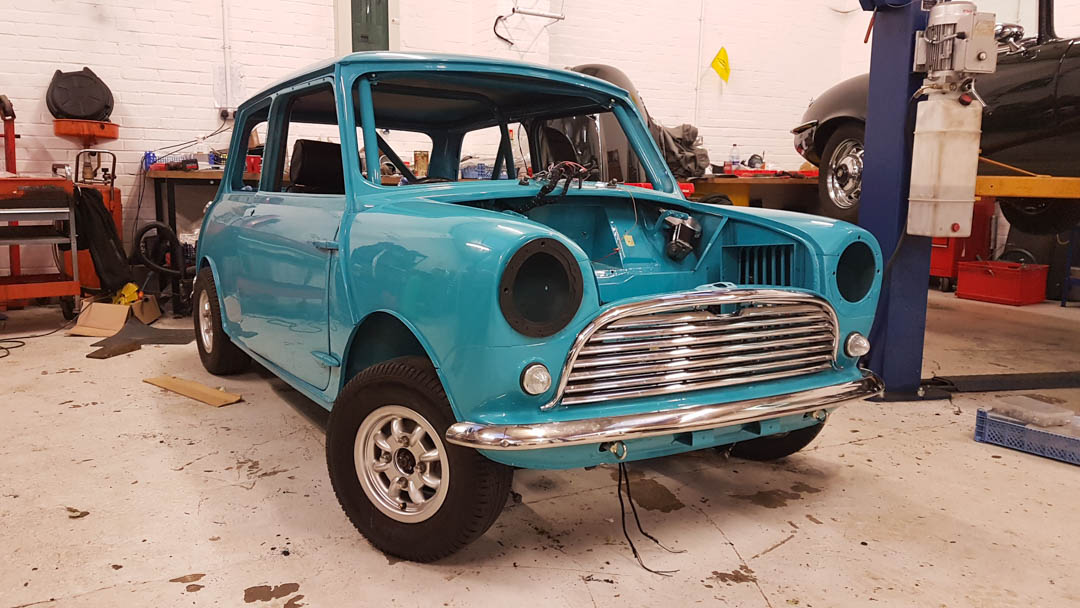
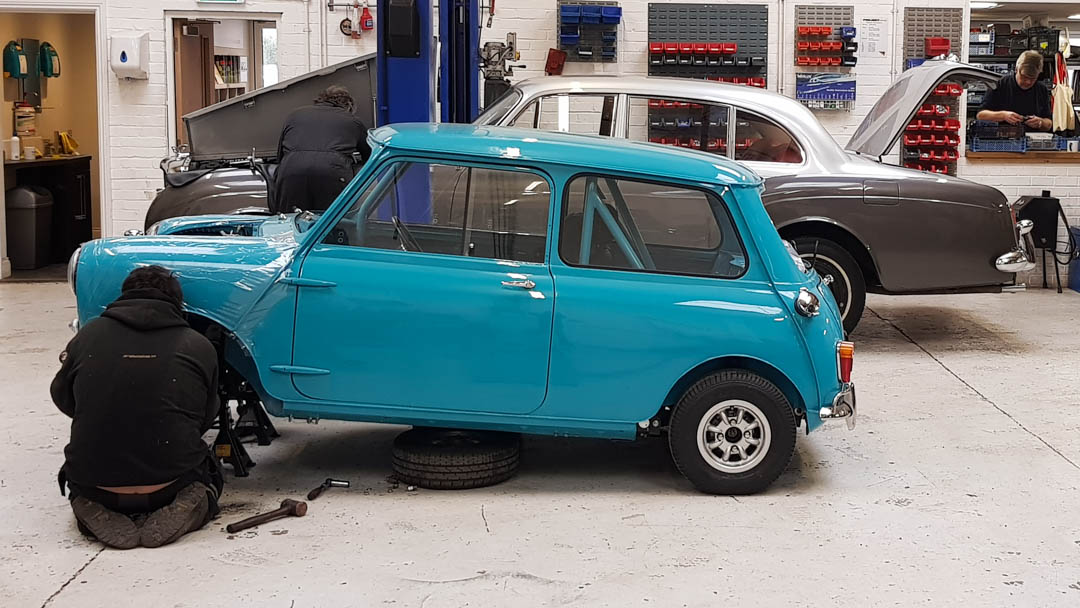
Building Our Ultimate Mini.
Project Shop takes great pride in training our staff and participating in the apprenticeship schemes that give us our start.
Project Background
In July 2016 we were looking for a car for our Level 3 apprentices to take on. With these final year projects, we aim to teach the apprentices what college misses which includes:
- The vision
- Planning the various stages of restoration
- Selection and ordering of components
- Financial management of a project
- Making sure that tasks are completed to the right standard
- Time management
- Packaging upgrades and modifications
- Shake down and problem solving
The car was to be built on a tight financial budget, using as many components from stock as possible without ruining the cars integrity or getting in the way of our day to day business.
Project show takes great pride in training our staff and participating in the apprenticeship schemes that give us our start.
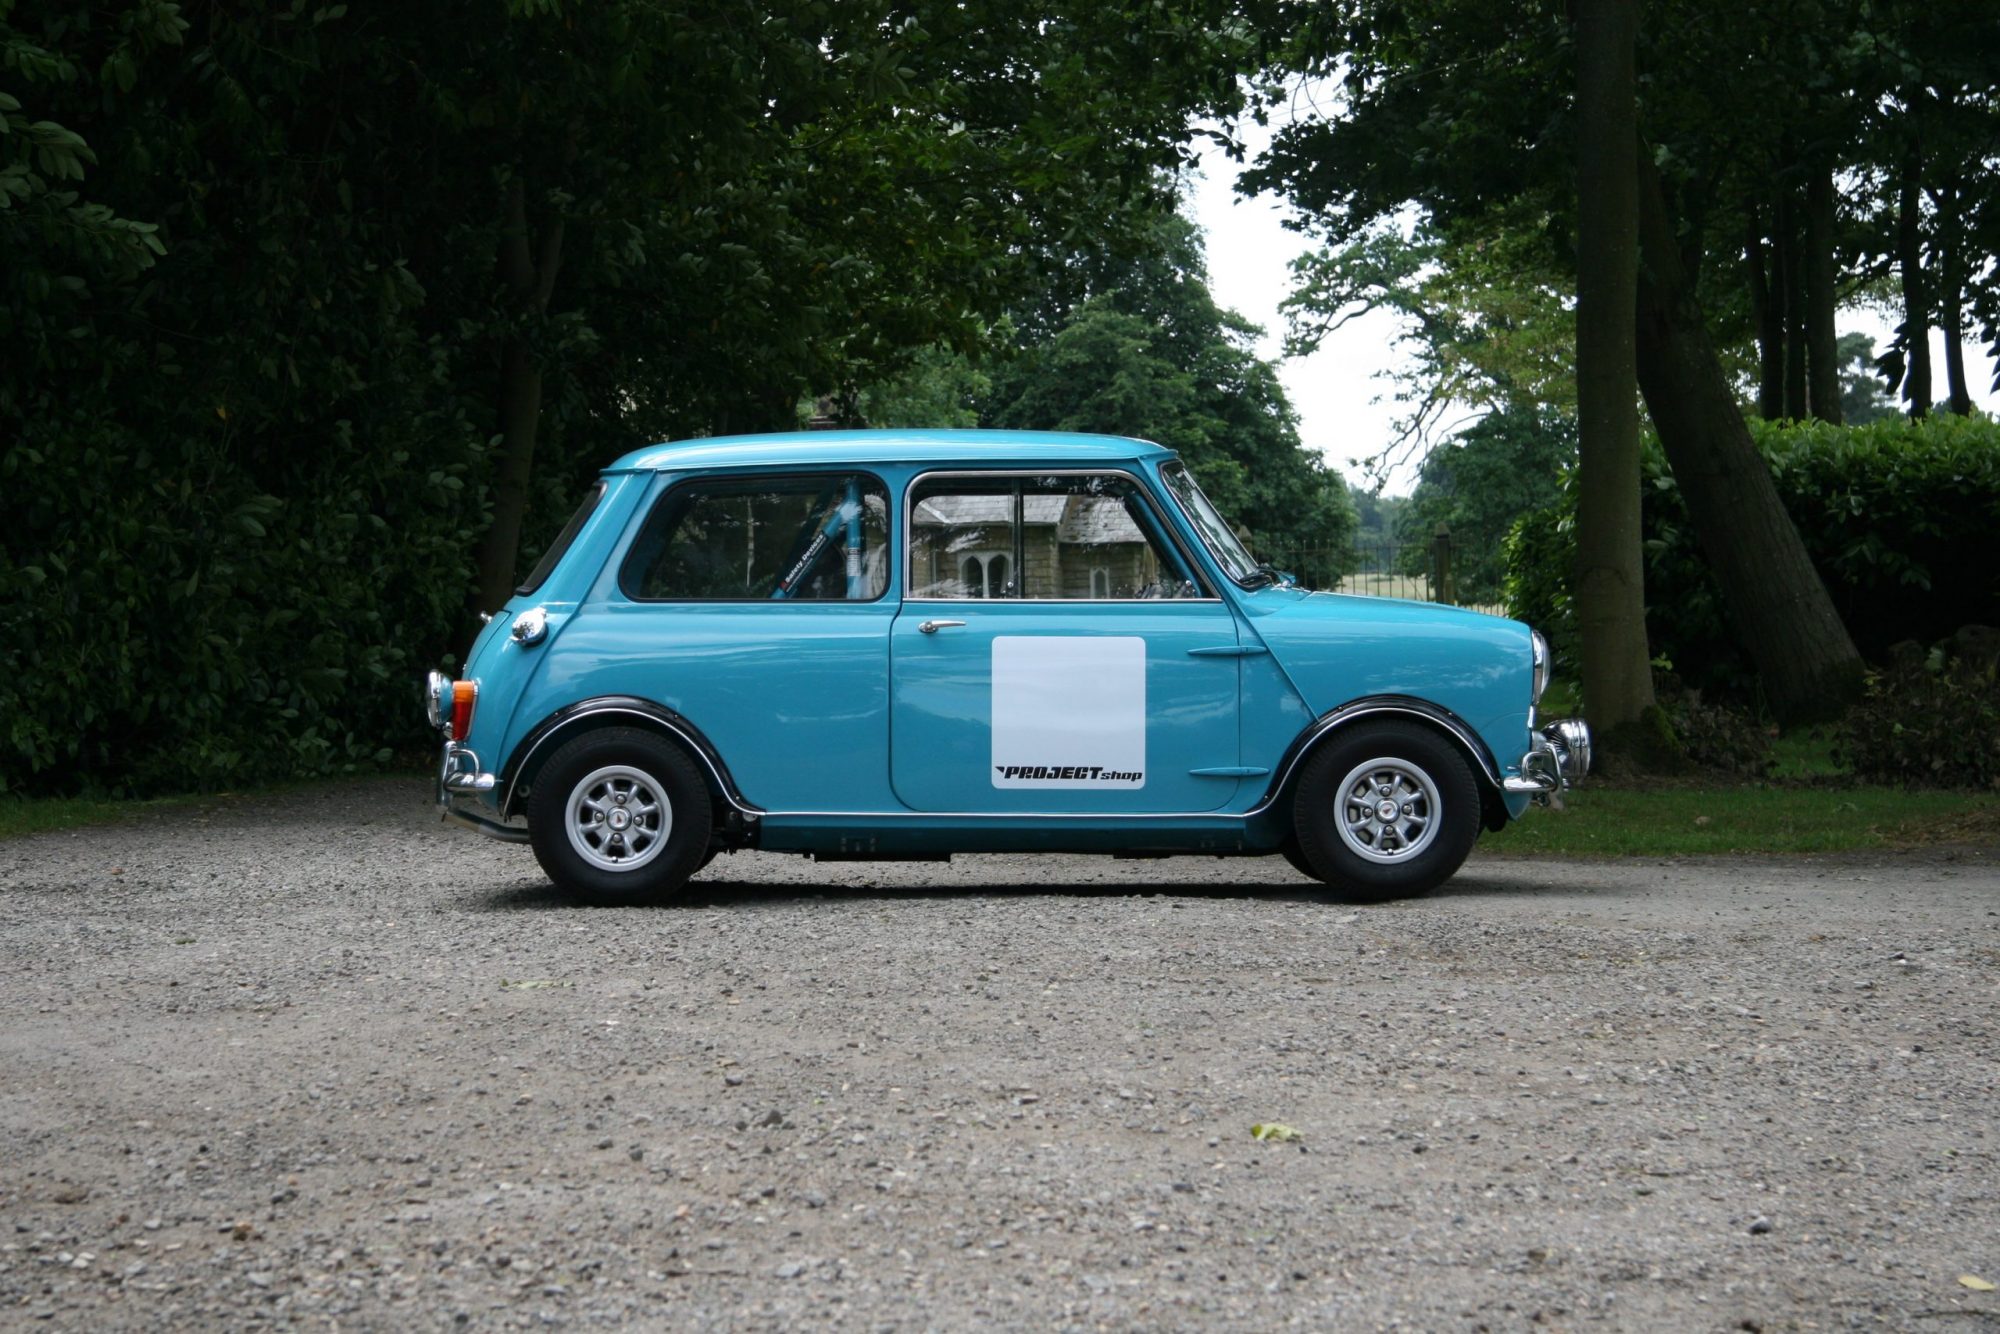
Generally, on a commercial project we would expect to finish a Mini within a 3-month period, however this car was to be built during down time, so we set a time scale of 2 years. Our goal was to have the car ready to be shown at our local blue-ribbon event – Bicester Heritage’s Flywheel Festival in June 2018.
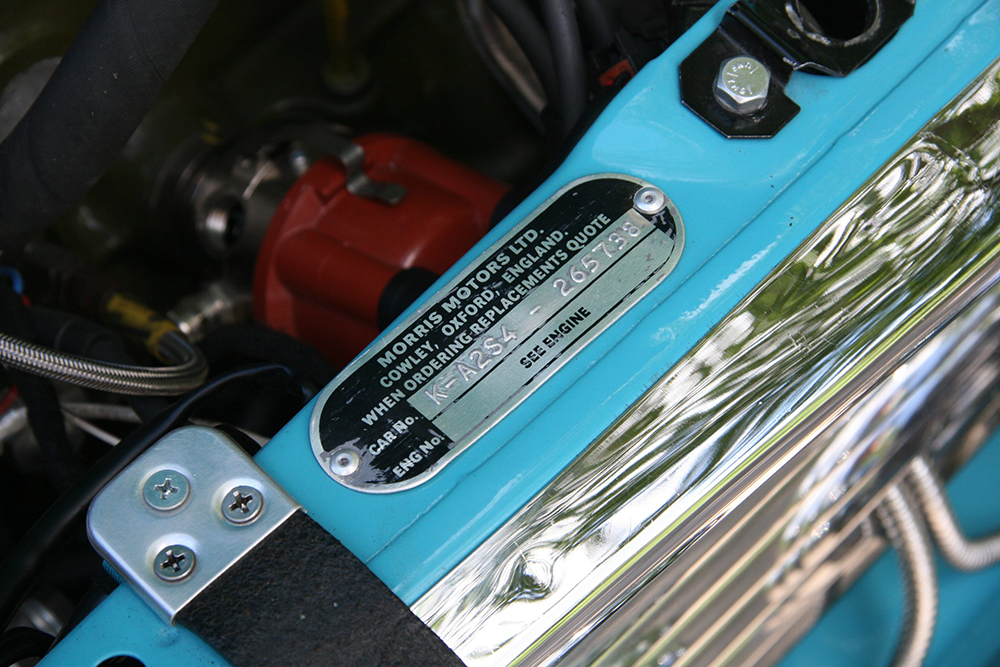
Make and model – Morris Mini Cooper Mk1 (997cc)
Date of build – 21 June 1962
Spec – RHD (Home Market)
Colour- Surf Blue (monotone)
Destination Dealer – Kennings Ltd, Kingston upon Hull, Yorkshire
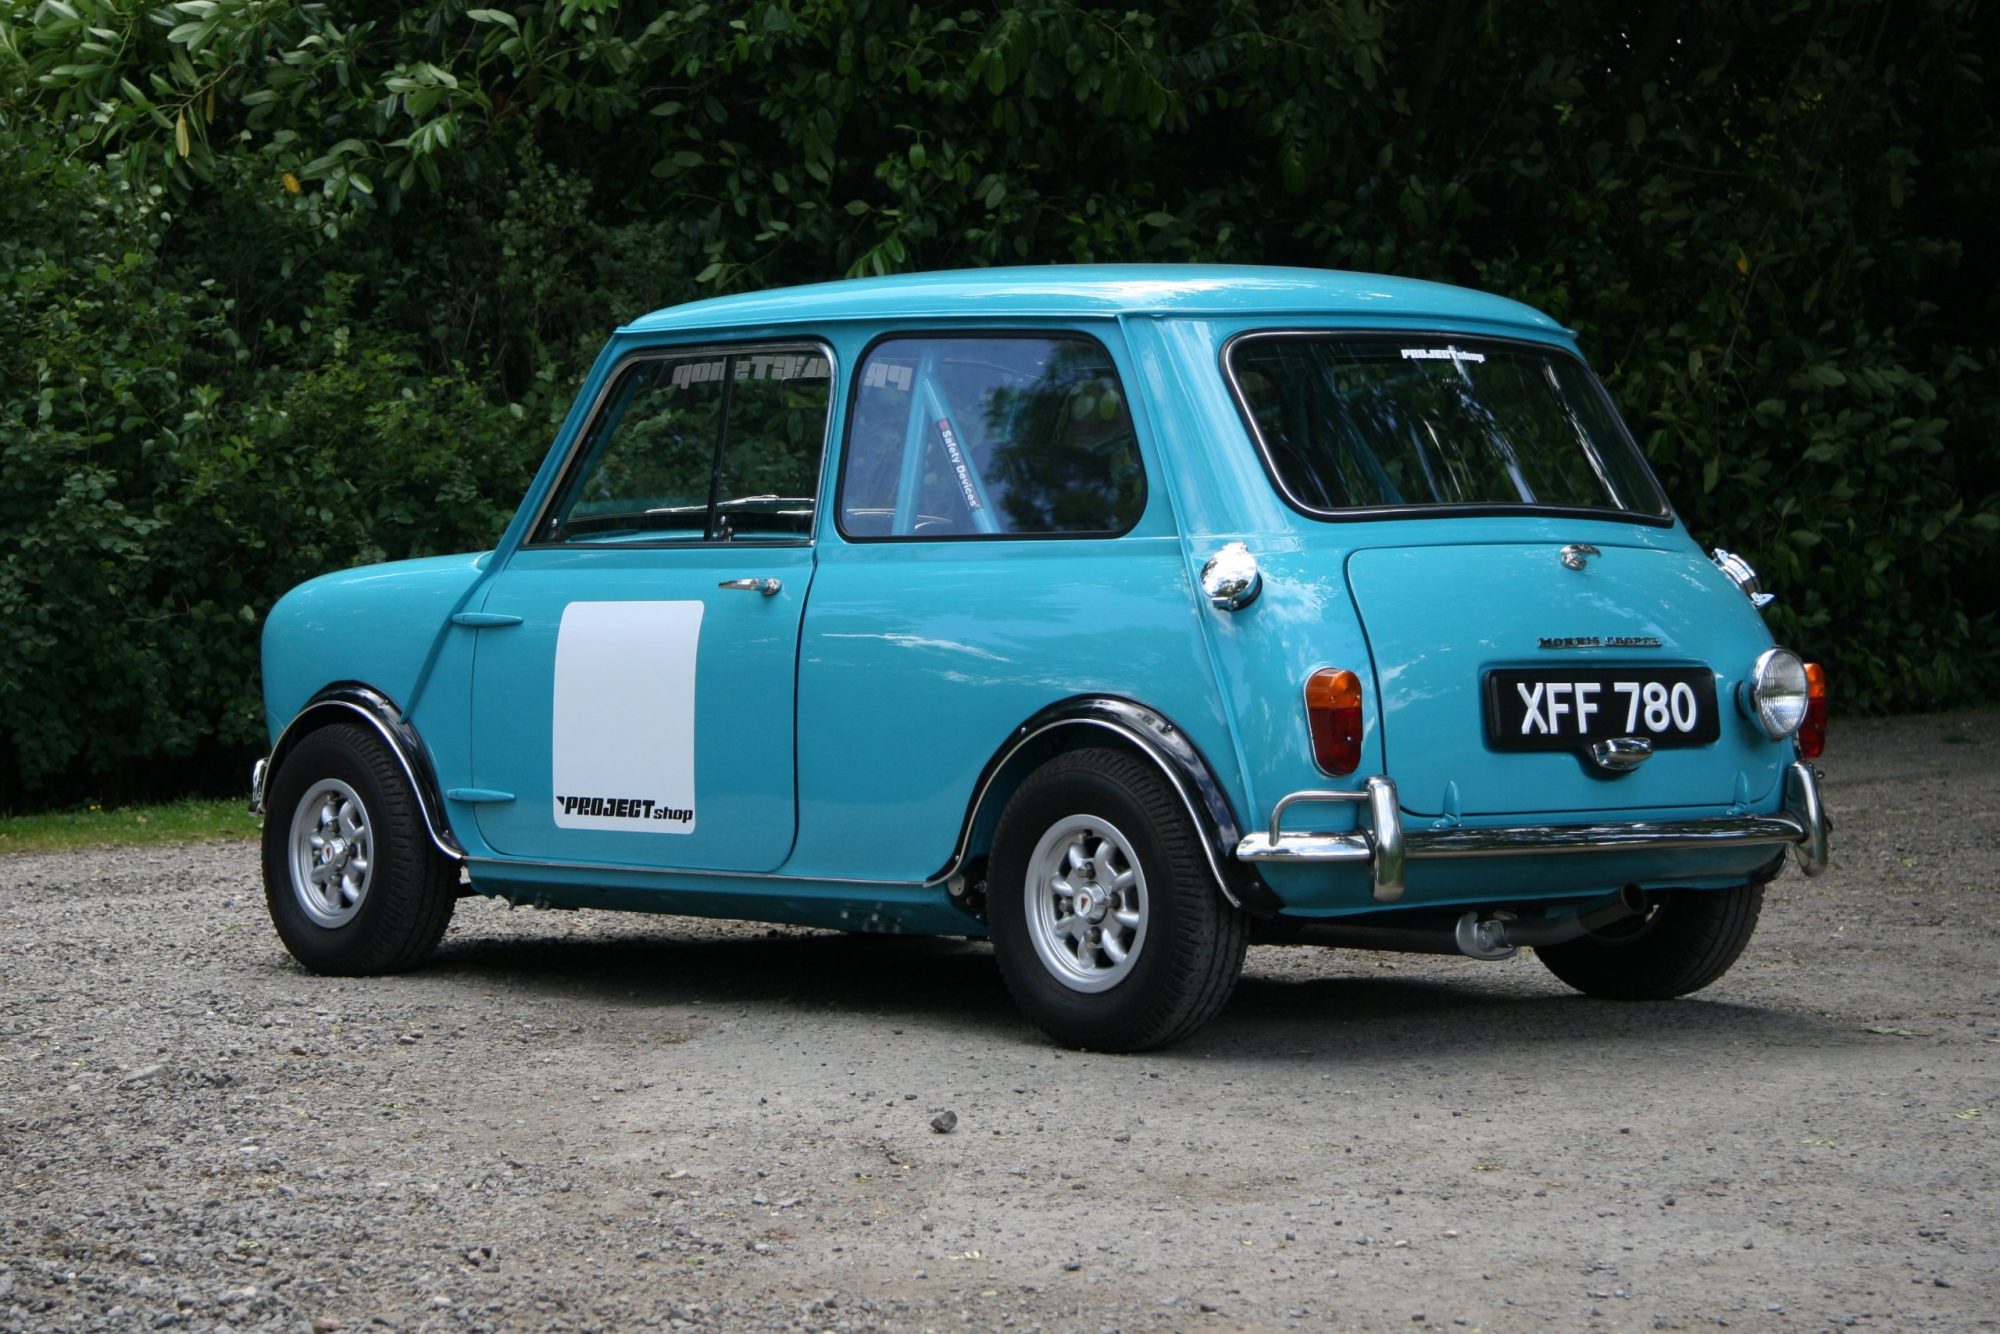
Reg Mark – XFF 780
Chassis Number – K-A2S4/265738
Built by – Zane Newall, Gareth Davis, Matthew Dowell
The Vision
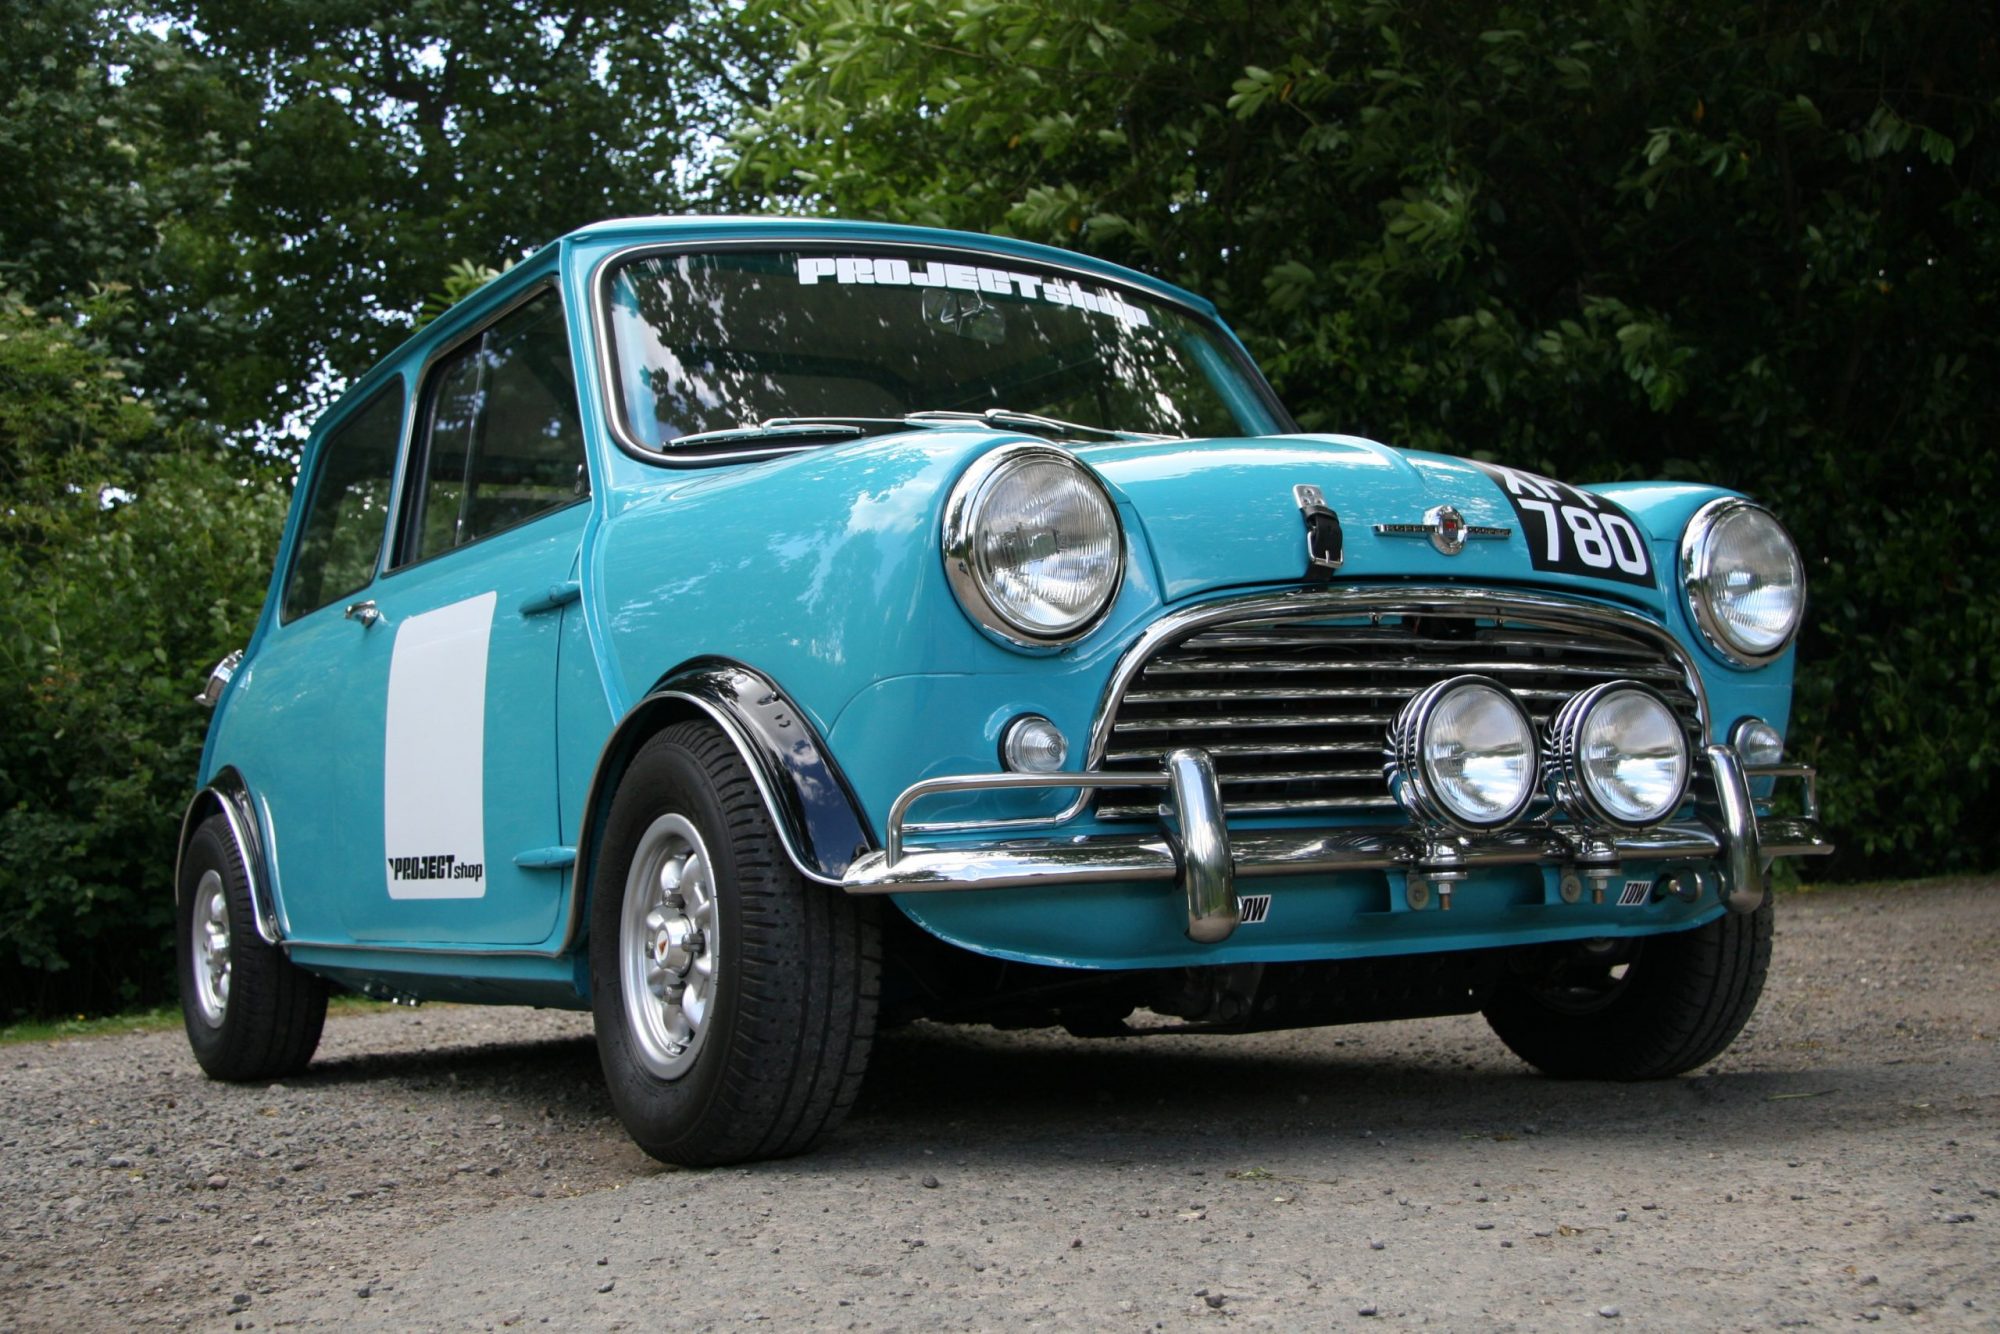
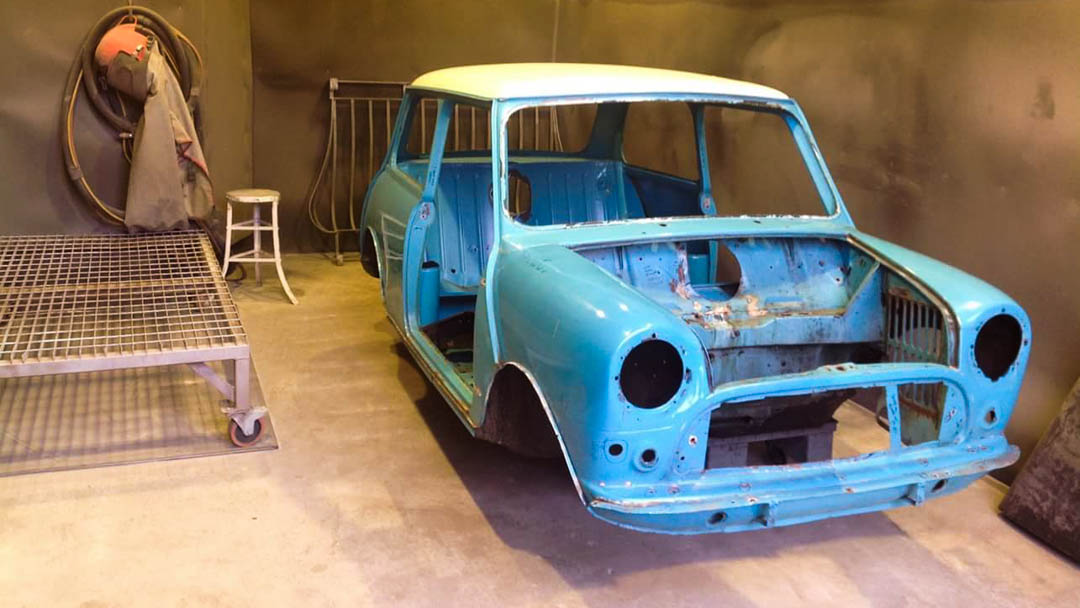
XFF 780 had led a hard life before she came to Project Shop. Although the shell was sound, it was well used. Most of the interior had been stripped out, a later A+ engine, gearbox and selector had been fitted and there were holes all over the place from previous modifications, roll cages, badges and spot lamps.
Both front wings had significant impact damage and both inner and outer sills had been poorly repaired in the past. We were never going to find her original engine, so we decided to build the ultimate ‘Project Shop Café Racer’. We penned out the following spec for the car:
• 1380cc A+ engine – Tractable but with loads of punch
• 45 DCOE carb
• Totally restored period bodywork (in original colour)
• Safety Device roll cage
• Reliable custom wiring loom
• Great heating/ventilation so she won’t steam up on wet events
• ‘Works’ inspired dash
• Could accommodate 6’ 6” driver
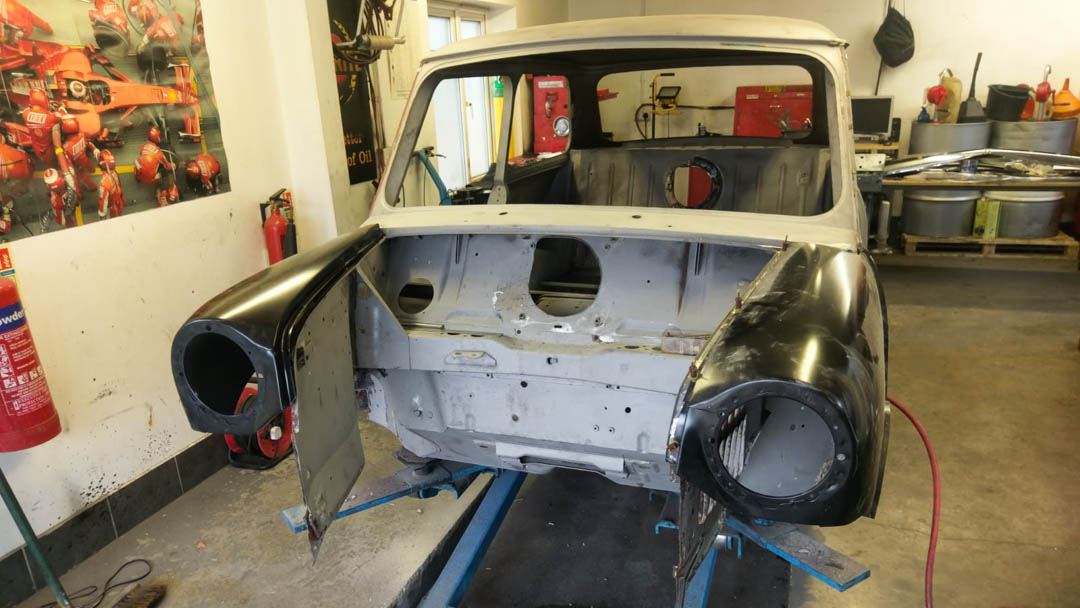
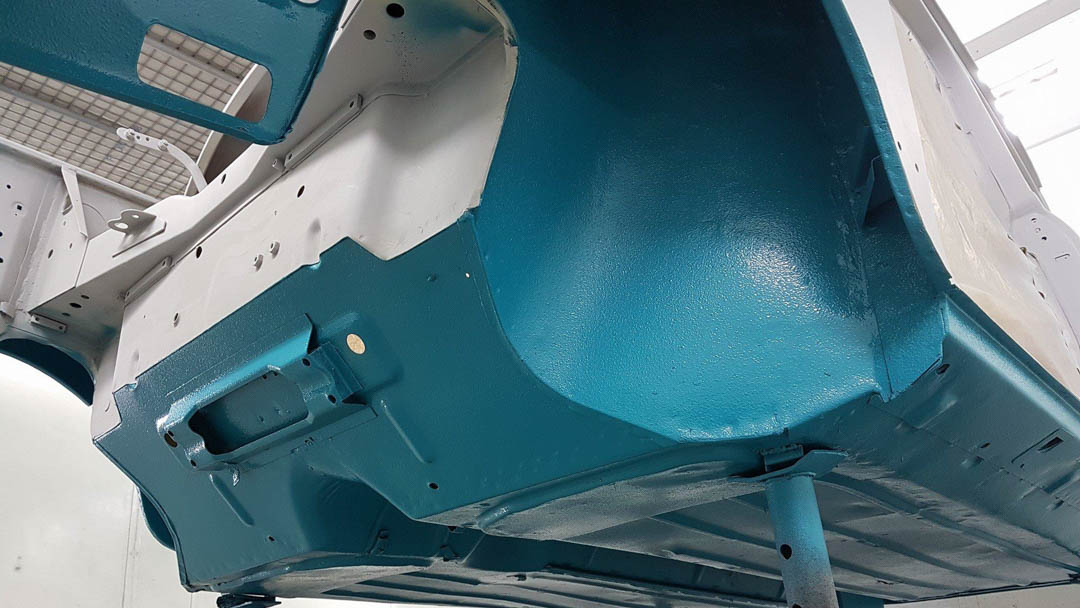
Bodyshell – Structural Welding
The vehicle was stripped to its component parts to leave an empty bodyshell, doors, boot, bonnet, dash and removable front wings. These were all sent to BMP Historic Sand Blasters (www.historicblasting.co.uk) to have the paint and rust removed.
From here we had a rust-free shell that could be assessed and repaired.
Engine Bay
- The bulkhead had been roughly cut to accommodate a Weber carb, this whole was enlarged, and a Mini battery box was modified and welded in place
- The fan shroud was missing so this was welded in place
- Minor pin holes welded up
Interior
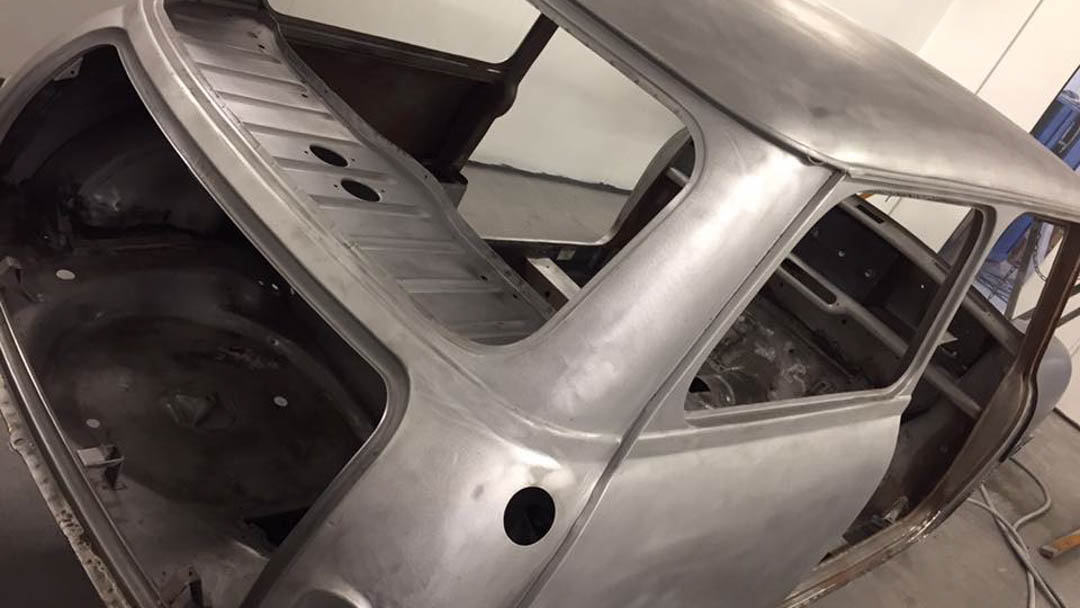
- Inner sill panels on both O/S and N/S were cut out and replaced with new panels from Mini Spares
- Drilled holes from pervious installations in the floor, front bulkhead, rear bulkhead were plug welded
Chassis, outer sills and underside
- The original front valance panel was damaged, this was cut out and replaced with new (early ones were not available, so the corners were cut from the old panel and grafted onto the repair panel to be period correct)
- Both O/S and N/S A panels were rusted out these were cut from the shell and replace with new panels
- O/S and N/S outer sills had had previous poor repairs, we decided to cut both out and replace with new
- O/S and N/S jacking points were replaced with new
- The battery box in the boot was heavily corroded so it was cut out and replaced with new.
- Because the interior was to be largely bare a massive amount of effort was put into making sure that the interior panels were as close to perfect as they could be.
Bolt on panels
- N/S and O/S front wings were replaced
- Bonnet – Previous holes for ‘S’ badges and spot lamps were all plug welded
- Boot lid – Previous holes for ‘S’ badges and reverse lamps/fog lamps were all plug welded
- Headlamp area – New headlamp bowls were fitted
Mock build of body
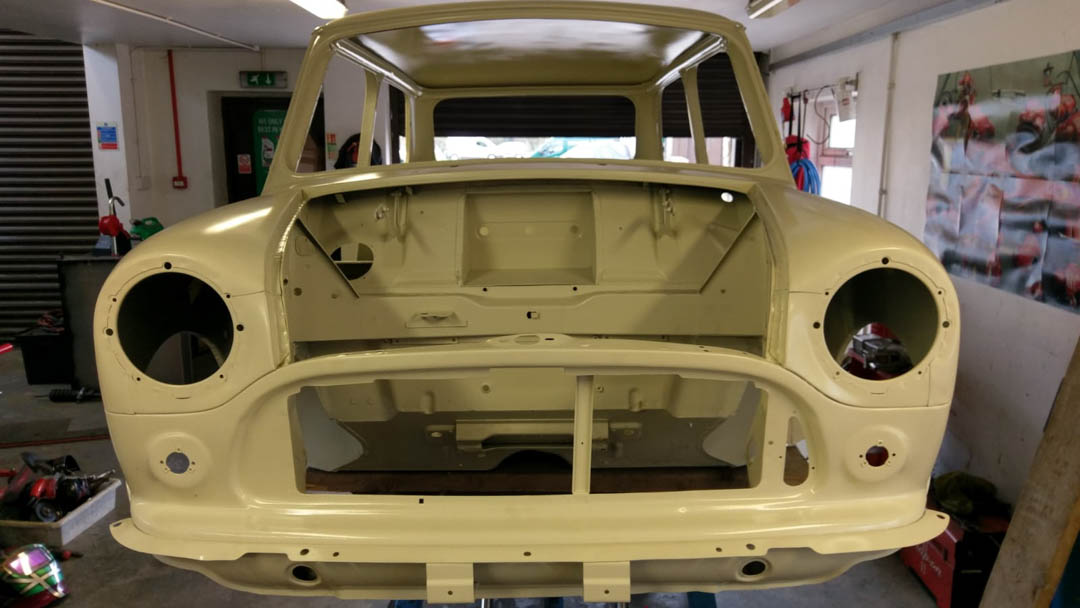
All welds were linished back before the front panel, front wings, bonnet, doors, boot panel were all dry fitted to bodyshell, checked for gaps and adjustments made to ensure a close and even fit to the vehicle. Once we were happy with the fitment the car was transported to KC Autocolour for body preparation and paint.
Parts used to repair bodyshell
The following were all sourced and supplied by Mini Spares (www.minispares.com)
2 x Battery Box | O/S A panel | N/S A panel | Front panel | O/S front wing | N/S front wing | Radiator cowling | N/S outer sill | O/S outer sill | O/S inner sill | N/S inner sill | O/S jacking point | N/S jacking point
Materials used to repair body shell
3 x Bottles of CO2 welding gas | 1 x 1m x 1.5m x various thicknesses of sheet metal | 10kg of welding wire | 12 x 500ml Cans of Zinc Primer (welded areas primed as we went) | 188 Linishing refills | 57 cutting and grinding discs
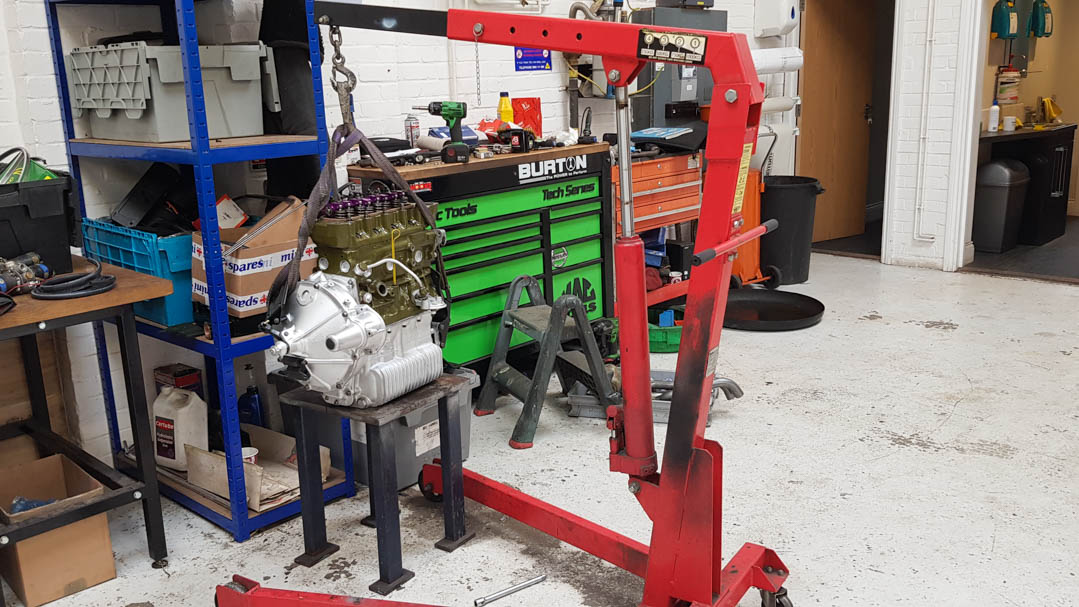
Drive Train
Engine
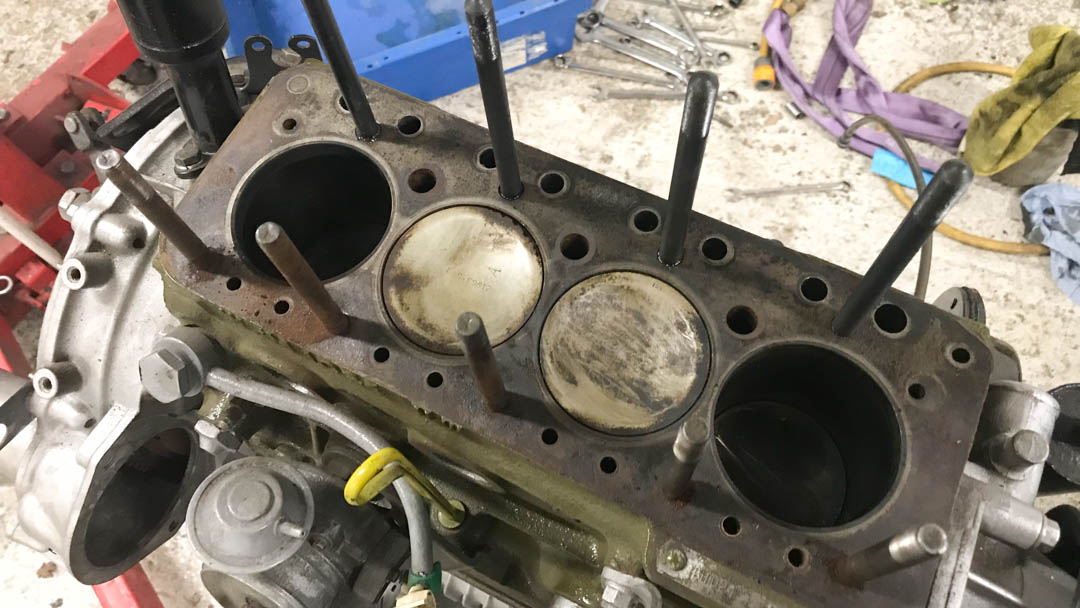
The engine was stripped to component pieces and the lower half (block, crank, flywheel and pistons) sent to FJ Payne LTD (www.fjpayne.com) specialists in Vintage and Classic engine machining for the following work to be carried out before the engine could be rebuilt.
- Engine block chemically cleaned, and crack tested
- Bores over-bored and honed to increase capacity to 1380cc
- New piston rings supplied and fitted
- Crankshaft lightened and dynamically balanced with lightened flywheel
The engine was rebuilt in house by Zane Newall using either reconditioned or new components as listed below. One of the benefits of the original car, was that it came with a recently rebuilt A+ gearbox from Heathrow Transmissions (www.heathrowtransmissions.co.uk) which was checked and then fitted to the engine.
Parts Used
The following parts were largely sourced from Mini Spares
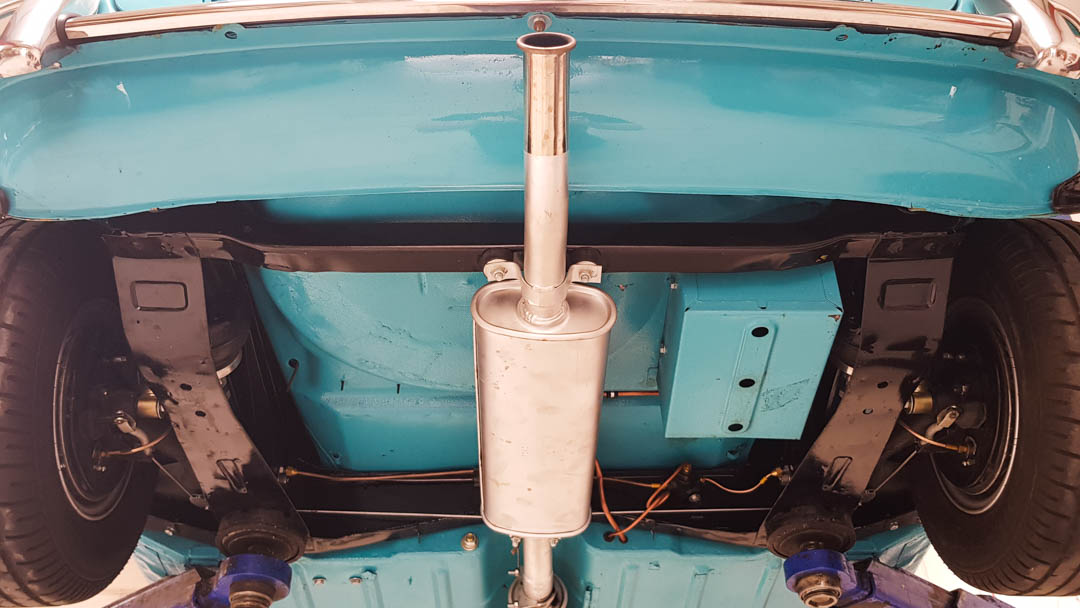
1380cc pistons and rings | Con rods | Shells and bearings | Full gasket and seal set | Copper head gasket | Stage 3 (Special Tuning) Mini Spares unleaded head (C-AHT133) See Spec Sheet | Fast road cam (EVOLUTION001) | Roller rockers (C-AHT446A) | Alloy rocker box, T-bars and gaskets | Duplex timing gear | NGK spark plugs | Sump plug and washer | Black silicon hose kit | 82-degree thermostat | Fan belt | Oil cooler | High capacity radiator | RC40 centre exit exhaust system | LCB Down pipe | Short Weber intake manifold | Fully rebuilt and re-jetted Weber 45 DCOE Carb (parts from www.eurocarb.com) | RAM-FLO air filter | 123 Programmable distributor | Competition clutch | 2 x Fuel filters | Oil pressure sender | Water temperature sender | SU Twin head fuel pump (originally fitted to a Bentley MK6, stripped and rebuilt in house using parts from Burlen LTD (www.burlen.co.uk) | Malpassi fuel regulator | Heater valve | Silicon HT lead set | 70 AMP Alternator | Core plug set | Oil pump (sourced from stock) | Rally spec engine stabilisers | MK 1 Mini cooling fan (found on eBay and reconditioned in house)
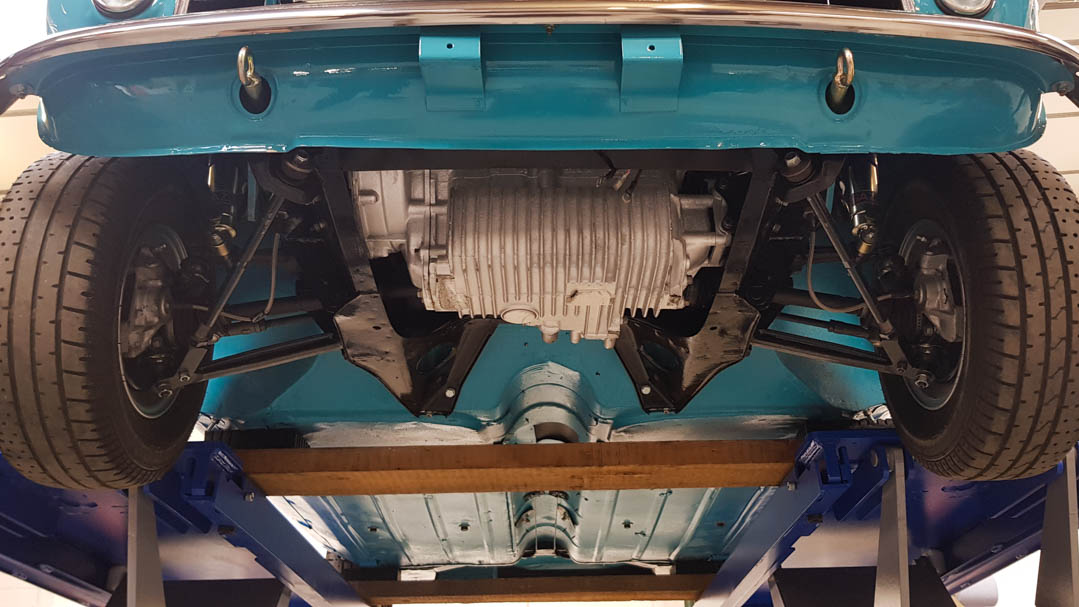
Front and Rear Subframes
The front subframe already benefited from a set of Cooper S front disc brakes and calipers. Both front and rear subframes were removed from the vehicle, sand blasted, zinc primed and painted with gloss black Raptor paint. The calipers were rebuilt and the rest of the subframes were rebuilt in house using the following new components from Mini Spares.
Complete bush kit | Front wheel bearings | Front hub nuts and washers | Lower arm bushes | Front bump stops | Rear subframe fitting kit | Radius arm rear (O/S and N/S) | Rear wheel bearing kit | CV joint gaiters | Pot joint gaiters | Front discs | Rear Mini-fin drums | Brake pads | Brake shoes | Wheel cylinders | GAZ adjustable shock absorbers | 3/8 UNF 60 degree wheel nut set | Mini Cooper S brake servo | Mini Spares Hi-Lo front and rear car set | Sump guard

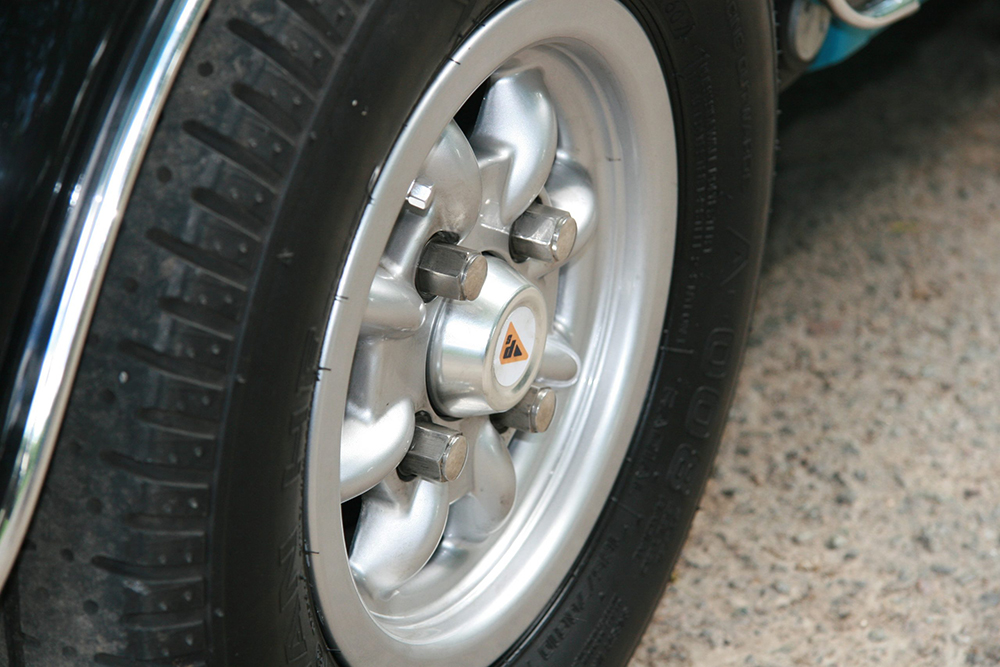
Wheels and Tyres
- The 5 original magnesium Mini Lite wheels were sent to Pristine Wheels in Milton
- Keynes where they were stripped and fully refurbished in Gloss Silver
- They were fitted with 5 x Yokohamma A008A Tyres
- Wheel spacers to fill out arches
- Wheel centres with Project Shop logo
Electrics
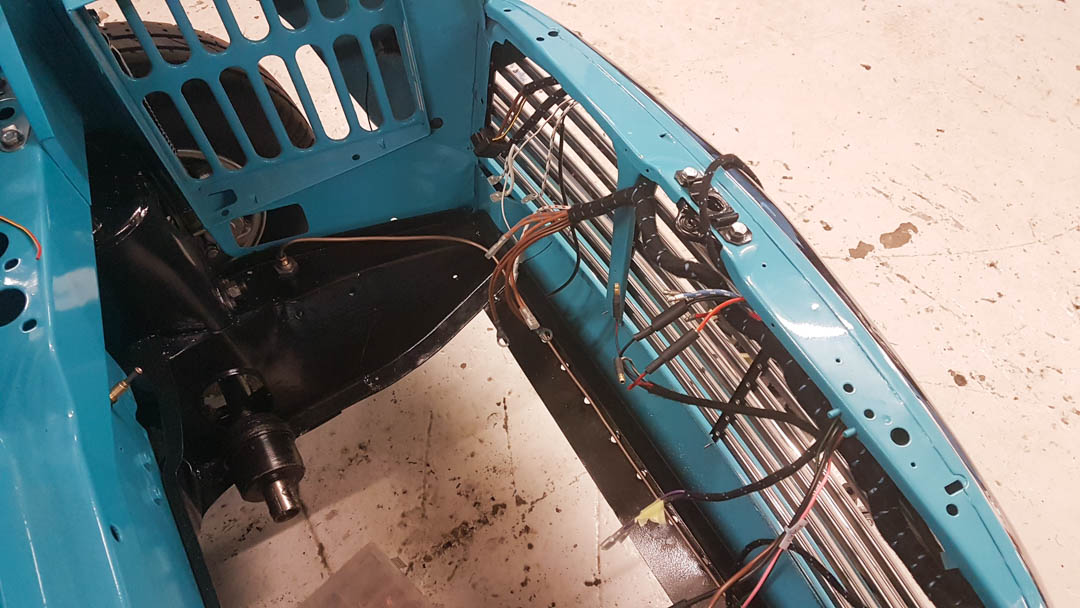
We decided to start from scratch when it came to the electrics on this car. The original loom had had many modifications over the years and was in a poor state of repair. We ordered a new loom as a start point from Autosparks, as well as a Varley 30 race battery from JJC Race and Rally. The loom was laid out in the vehicle and then modified in house to suit our specific needs.
The fuel pump was located in the boot, battery behind the passenger seat (with built in trickle charger) and the loom was modified in the engine bay to accommodate the 123 Ignition distributor. We then built a custom loom for the dashboard. This is wired into the original loom with quick release connector blocks, so the dash can be quickly removed if required.
Under the dash we have a custom 4.3KW heater unit supplied by Car Builder Solutions to provide heat and windscreen demist. This was especially important because the standard heater is very ineffective and we wanted to be able to use the car in all conditions.
The following new parts were used to complete the electrical installation on the car:
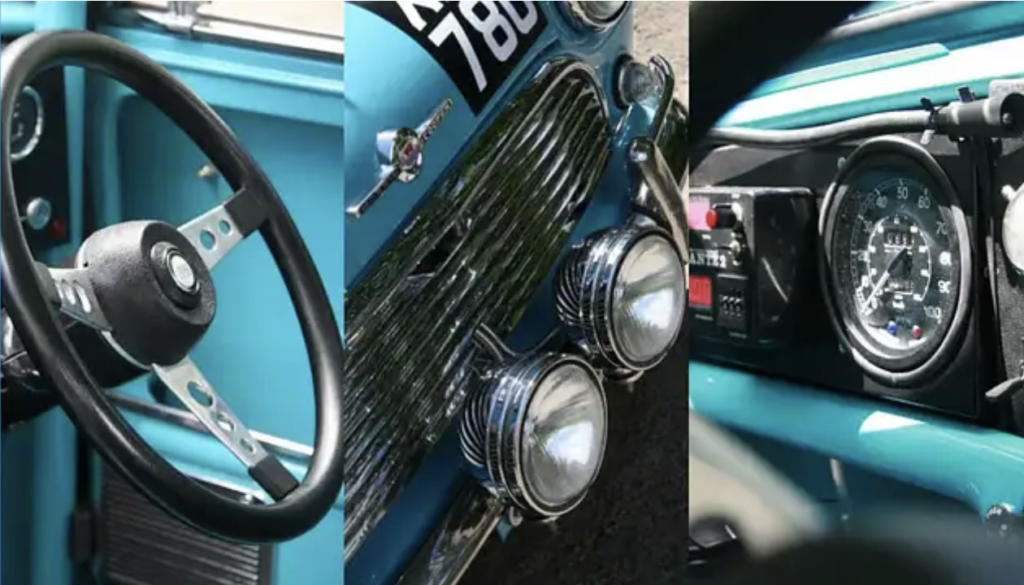
Mini Cooper wiring loom with front driving lamps | 70 AMP alternator | Air horns | Rear number plate lamp | Rear reversing spot lamp (Lucas, period) | Race battery and box | Trickle charger | 7 inch H4 headlamps | KC Hilltes 130W 6” | Custom switch gear | Battery isolator
Body Trim and Build
Sadly, there was not much left of the cars original trim that was going to look good enough to go on a freshly built car. We were able to save the glass, door handles and mechanisms, sliding front window mechanisms, steering column and gear stick, but all the other components were sourced brand new or were period components in excellent condition. The build was carried out by Zane Newall with help from Gareth Davis and Matthew Dowell (all post third year apprentices). Their work was checked by our Senior Engineer, John.
Parts Used
Front and rear bumpers including fixings | Front over riders | Chrome body line | Door rubbers | Boot rubbers | Boot rubber seal clips | Morris Cooper badge (front and rear) | Front and rear windscreen kit | Number plate holder (rear) | Rear number plate raised digits | Weather strip kit | Door kick plates | Door check straps | Rear view mirror | Morris grill | Door pocket mouldings | Front stick on number plate | Decal set | Bonnet strap | Sun visors | Locking fuel filler caps | Aston Martin flip filler caps | Speedwell arch kit | Chrome double windscreen washer jets | Track car squares | MSA stickers
The Interior
Once again there was little of the original interior left as the car had been stripped for Racing. Over the last couple of years, we have been involved in preparing several cars for Historic Rallies, so we used this experience in putting together the cockpit.
In keeping with the rally theme, the fuel lines, brake lines and wiring loom were all run inside the car. We used minimal Silent Coat sound deadening to kill the panel vibration in the car, made a rear parcel shelf trim and fitted a front carpet, but these were the only ‘luxury items’!
Other than put together a Mk1 Mini interior – which is pretty basic at the best of times we had 4 modifications that we wanted to work in.
Heating
There is nothing more miserable than being cold in a classic, or too warm because the heater ‘bleeds heat’ in the summer. There are several excellent aftermarket water heaters available, but we chose a compact unit from Car Builder Solutions which puts out a mighty 4.3KW of heat. Its size made it very easy to package up underneath the dashboard. It keeps the inside of the car warm in the winter and completely shuts off in the summer. There is also plenty of heat to keep the windows demisted even when it is pouring with rain.
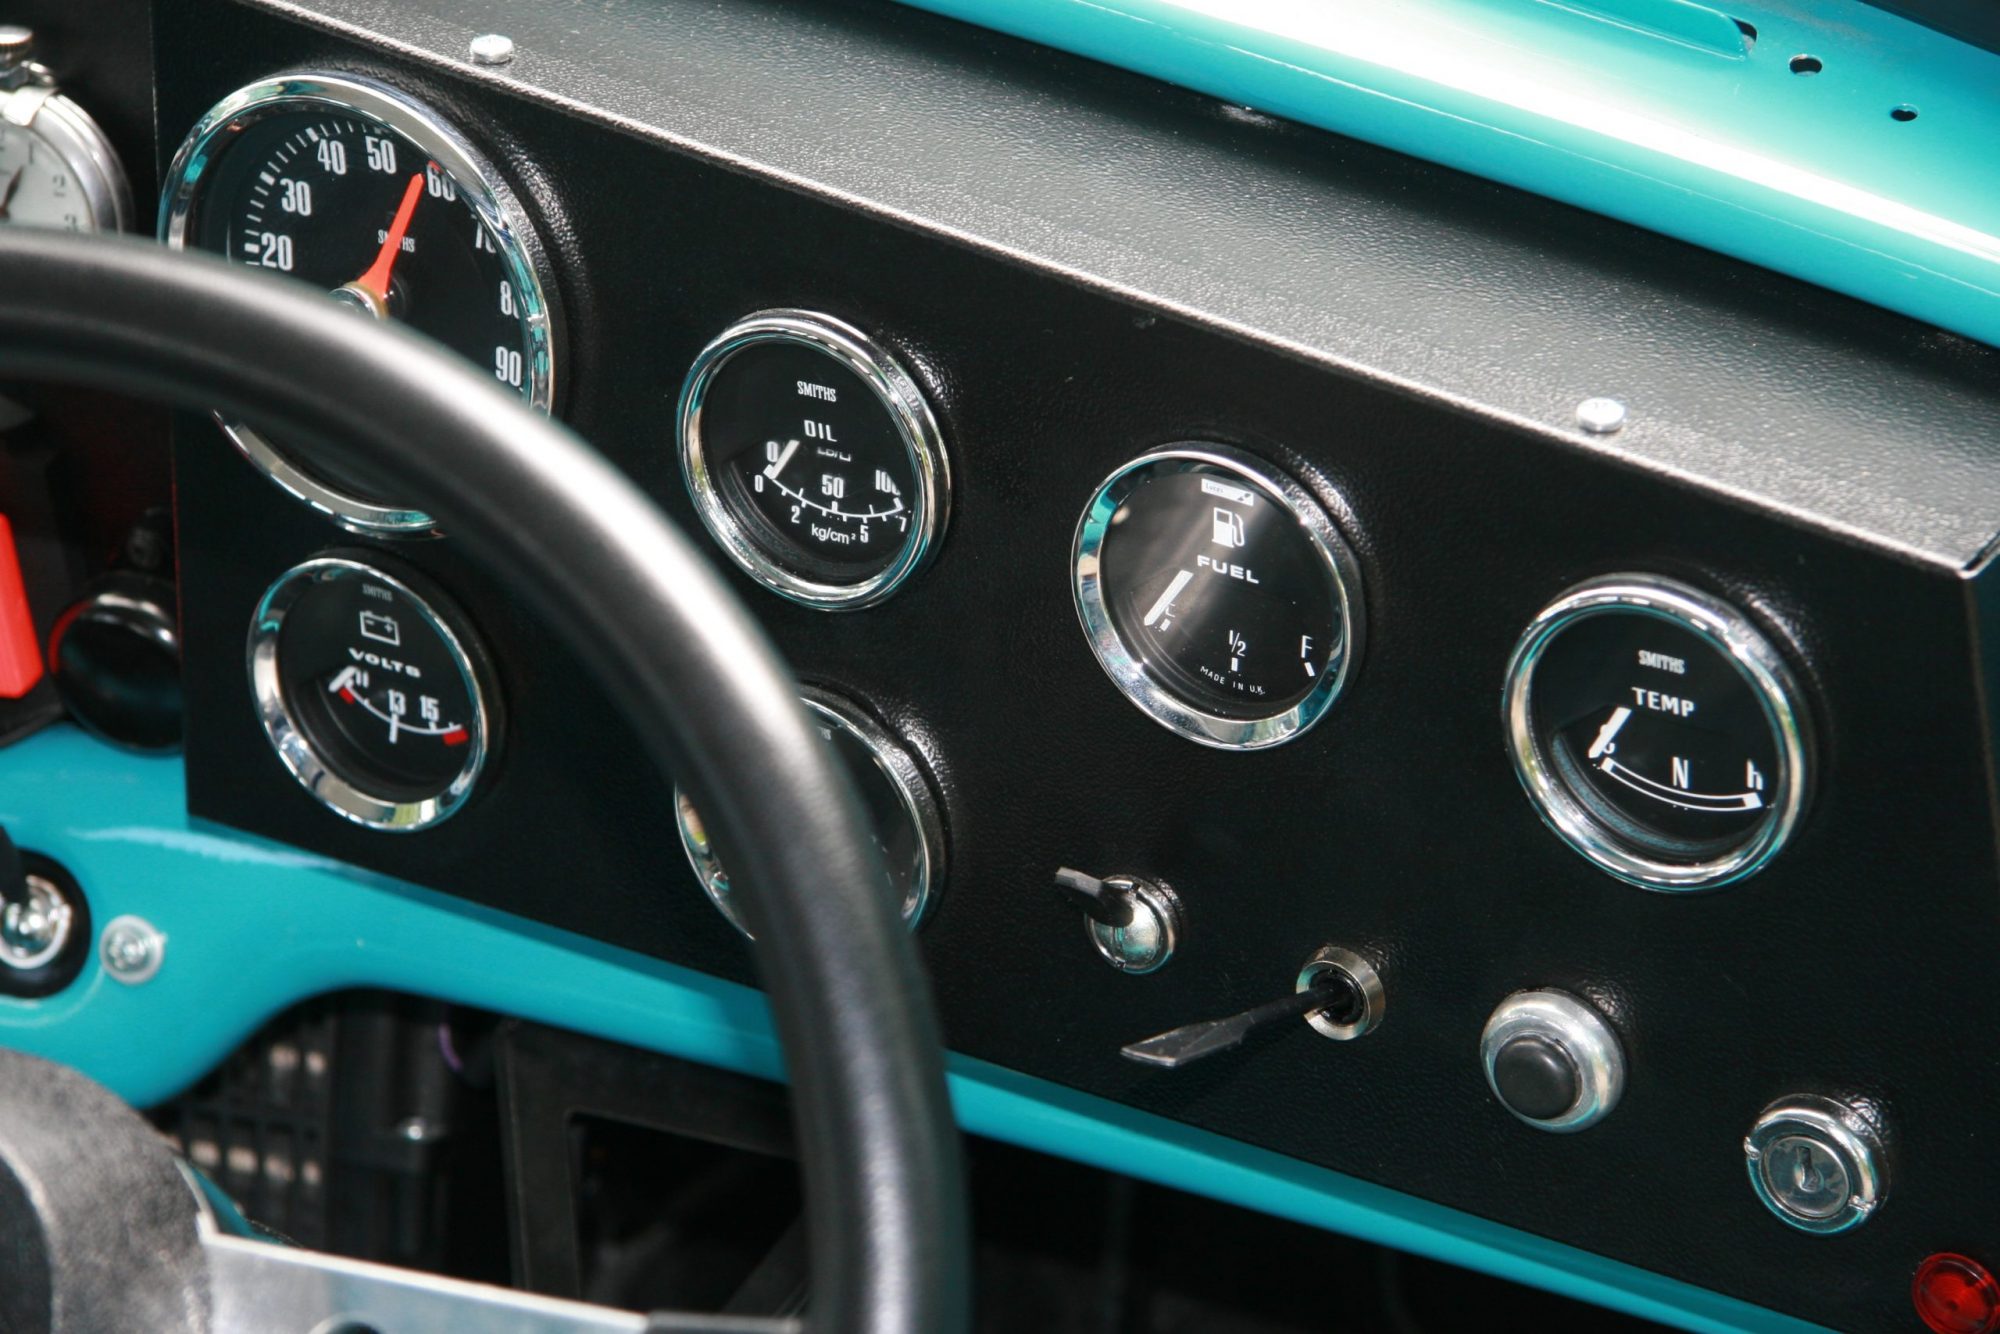
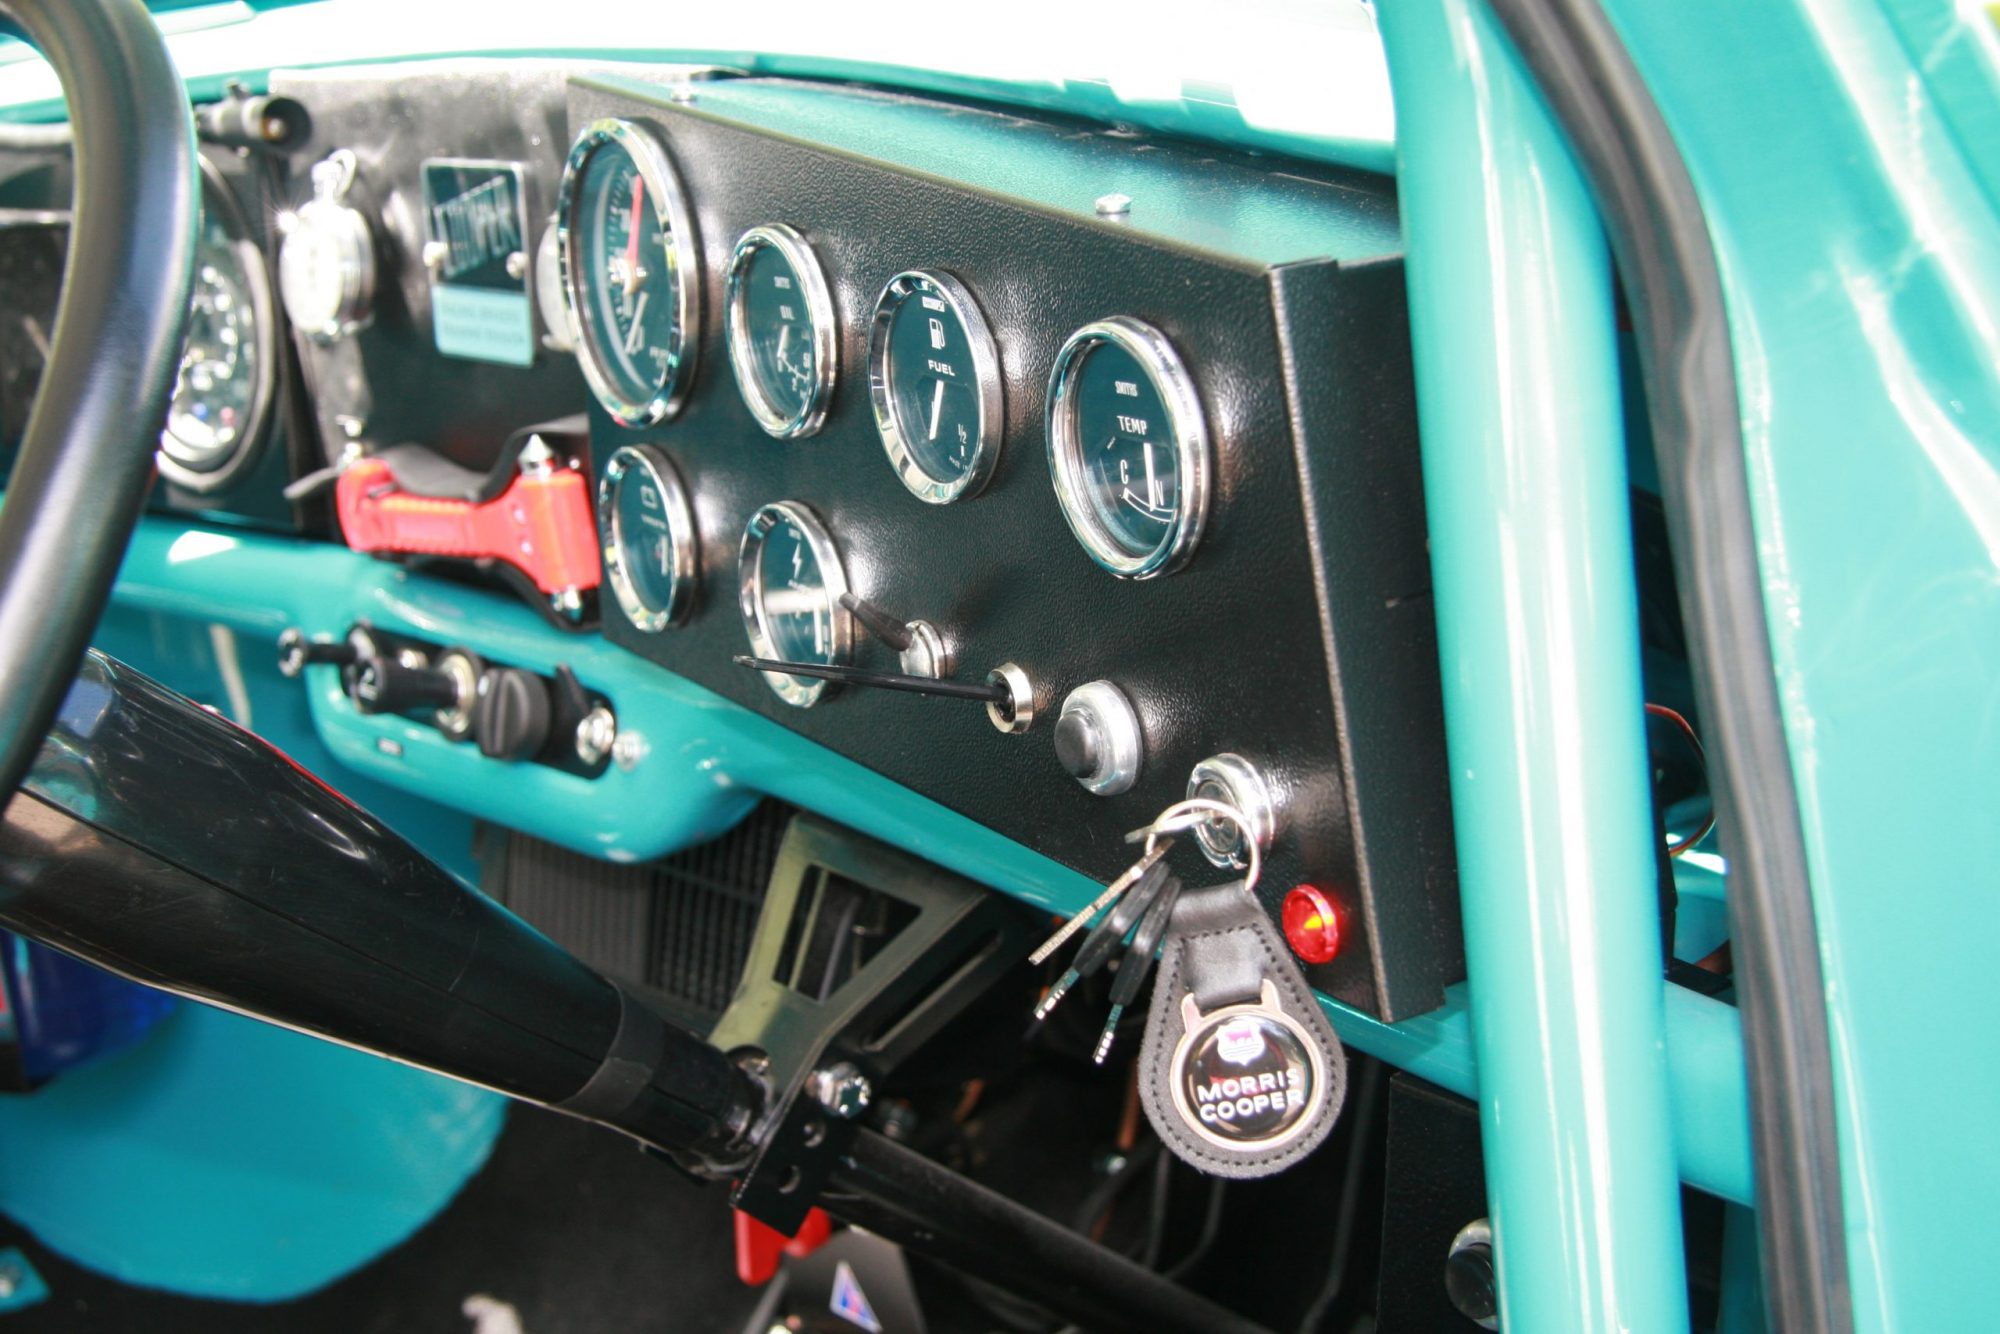
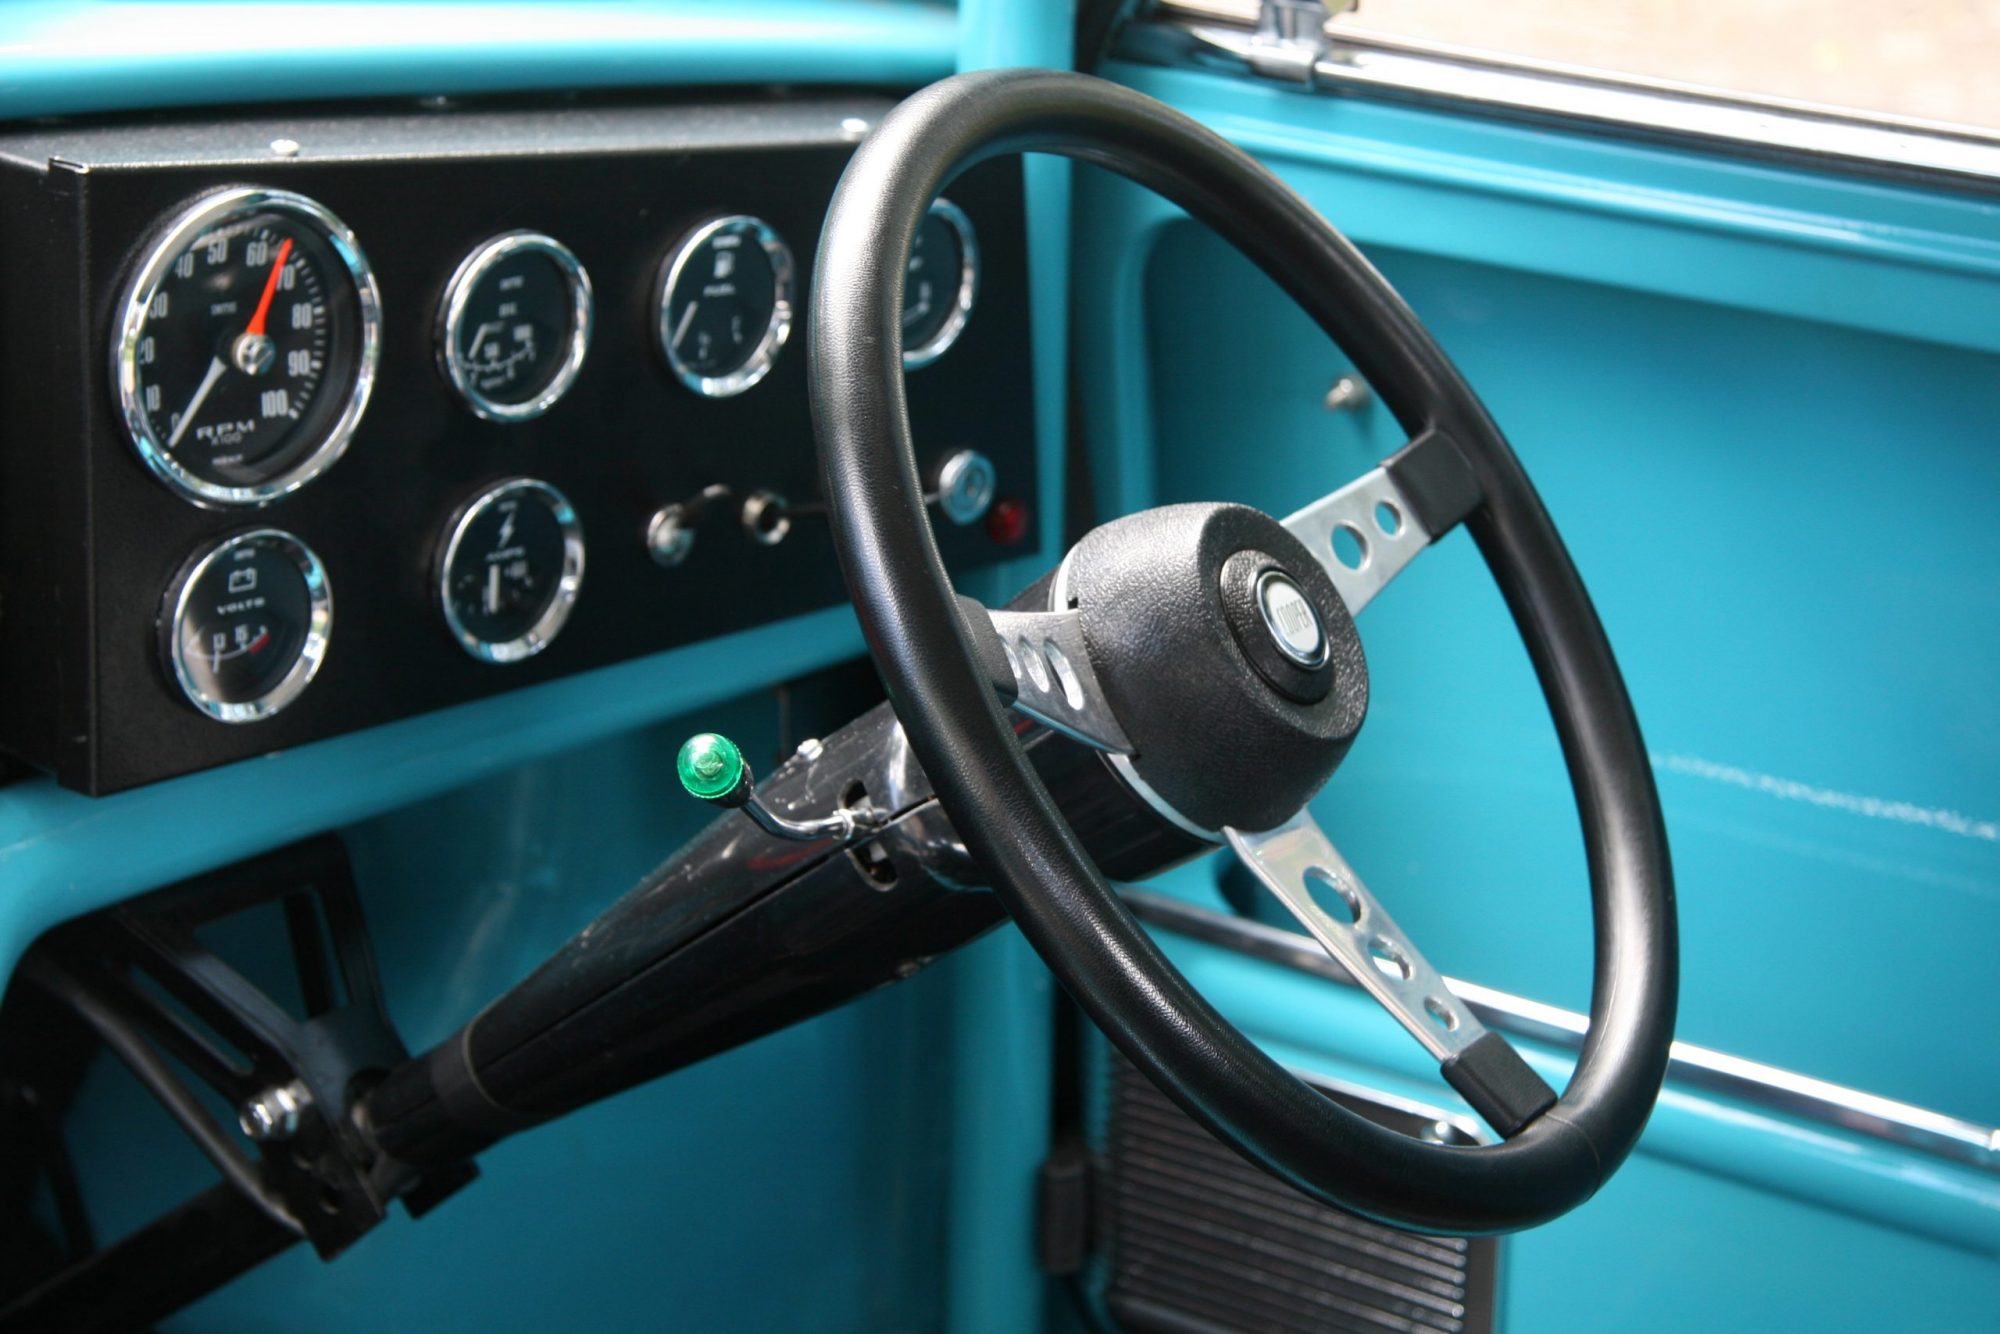
‘Works’ inspired dash board
When you have a look through the internet you realise that the only definitive part of a Mini Works Dash are the boxes in which the dials are housed. Given that were not trying to build a recreation of a specific vehicle, that gave us license to build the dash exactly as we required.
With the exception of the TR4 Smiths 100 MPH speedometer, which was serviced and re-calibrated by John Ostick at JDO Instruments (www.jdo1.com) all of the Lucas gauges in the dash are brand new. We fitted a Brantz II and period SpringAlex leather steering wheel to complete the look
We were ‘gifted’ a pair of stop watches by customer David Scothorn, who thought the centre of the dash needed ‘a little extra’.
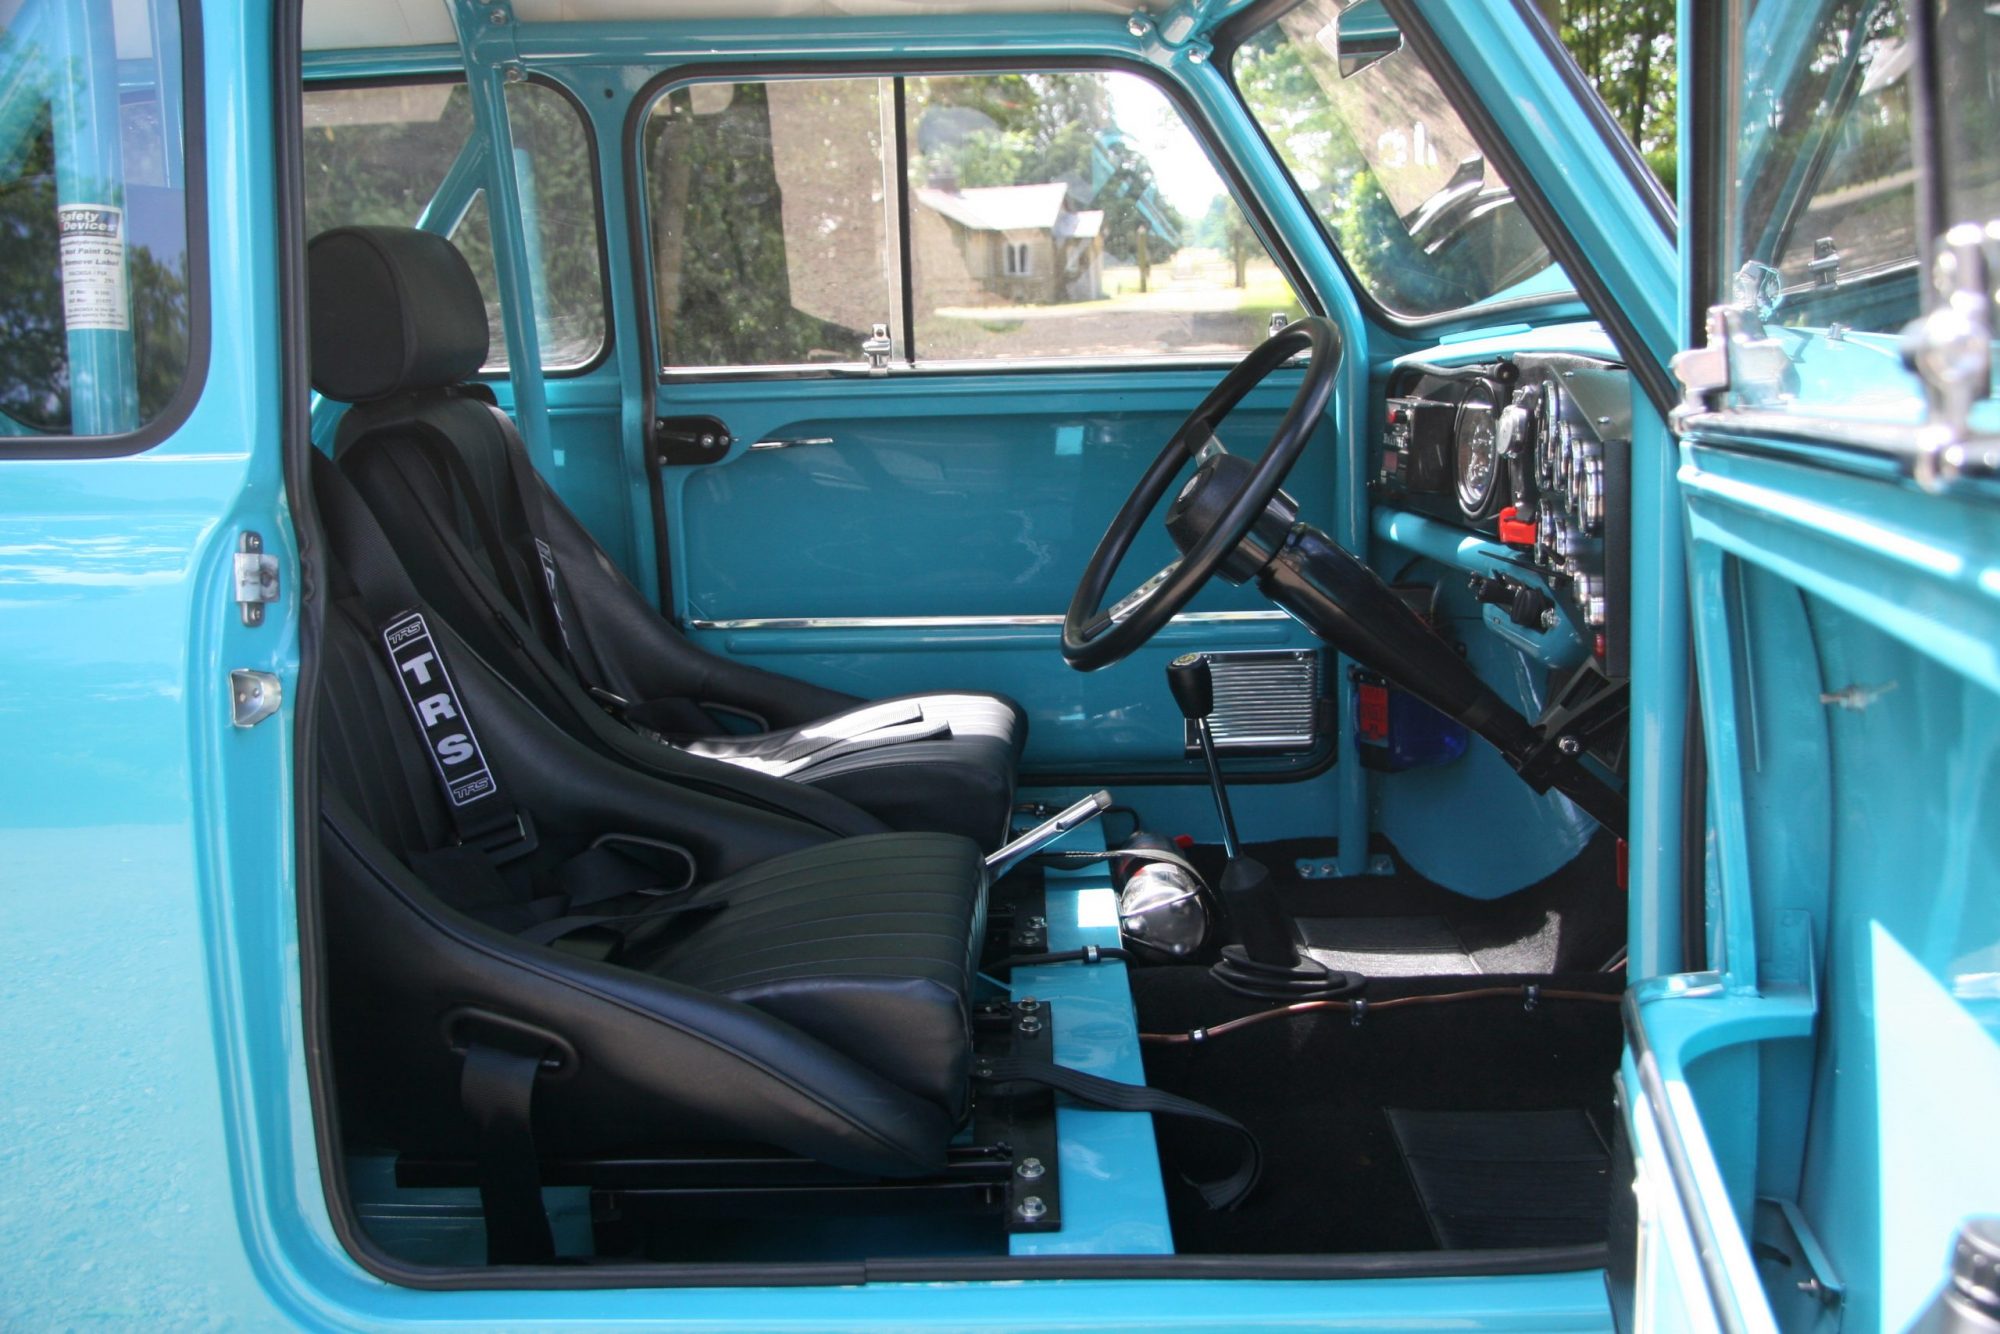
Seats, belts and driving position
With several different people in the frame for driving the car we wanted to make sure that almost anyone could get comfortable inside our Mini. The steering column was dropped with the aid of a specially fabricated mount and a pair of Coberau Classic Seats (wide fit) were fitted. We fabricated the seat mounts in house. They needed to provide enough movement to accommodate both a tall and short driver, be strong and look good as they were to be ‘on show’. We decided against a full set of 4 point harnesses as they are a major pain to get on and off, but there is a set of FIA spec centre buckle harnesses which make a good compromise for both road and track use.
Roll cage
In keeping with the Café Racer styling a 4 point Safety Devices roll cage was bolted into the interior of the car. It was painted body colour by KC Autocolour for that totally bespoke look.
New Parts
Accelerator cable | Front carpet set – Black | Headlining kit | Steering column bracket | Lucas fuel gauge | Lucas 10,000 RPM tacho | Lucas volt gauge | Lucas amp gauge | Lucas temperature gauge | Dash fuse box | Custom heater unit | Speedwell gear knob | Flyoff handbrake | Monte Carlo throttle pedal | Lucas Screen Jet washer bottle and pump | 2 x power points | SpringAlex steering wheel | Cooper steering wheel centre | Harnesses | TR4 100 MPH speedometer | Works dash pods | 18” Avanit map light | 1 KG powder fire extinguisher | Fuel isolator | Tool kit and wrap
Heating
There is nothing more miserable than being cold in a classic, or too warm because the heater ‘bleeds heat’ in the summer. There are several excellent aftermarket water heaters available, but we chose a compact unit from Car Builder Solutions which puts out a mighty 4.3KW of heat. Its size made it very easy to package up underneath the dashboard. It keeps the inside of the car warm in the winter and completely shuts off in the summer. There is also plenty of heat to keep the windows demisted even when it is pouring with rain.
‘Works’ inspired dash board
When you have a look through the internet you realise that the only definitive part of a Mini Works Dash are the boxes in which the dials are housed. Given that were not trying to build a recreation of a specific vehicle, that gave us license to build the dash exactly as we required.
With the exception of the TR4 Smiths 100 MPH speedometer, which was serviced and re-calibrated by John Ostick at JDO Instruments (www.jdo1.com) all of the Lucas gauges in the dash are brand new. We fitted a Brantz II and period SpringAlex leather steering wheel to complete the look
We were ‘gifted’ a pair of stop watches by customer David Scothorn, who thought the centre of the dash needed ‘a little extra’.
Seats, belts and driving position
With several different people in the frame for driving the car we wanted to make sure that almost anyone could get comfortable inside our Mini. The steering column was dropped with the aid of a specially fabricated mount and a pair of Coberau Classic Seats (wide fit) were fitted. We fabricated the seat mounts in house. They needed to provide enough movement to accommodate both a tall and short driver, be strong and look good as they were to be ‘on show’. We decided against a full set of 4 point harnesses as they are a major pain to get on and off, but there is a set of FIA spec centre buckle harnesses which make a good compromise for both road and track use.
Roll cage
In keeping with the Café Racer styling a 4 point Safety Devices roll cage was bolted into the interior of the car. It was painted body colour by KC Autocolour for that totally bespoke look.
New Parts
Accelerator cable | Front carpet set – Black | Headlining kit | Steering column bracket | Lucas fuel gauge | Lucas 10,000 RPM tacho | Lucas volt gauge | Lucas amp gauge | Lucas temperature gauge | Dash fuse box | Custom heater unit | Speedwell gear knob | Flyoff handbrake | Monte Carlo throttle pedal | Lucas Screen Jet washer bottle and pump | 2 x power points | SpringAlex steering wheel | Cooper steering wheel centre | Harnesses | TR4 100 MPH speedometer | Works dash pods | 18” Avanit map light | 1 KG powder fire extinguisher | Fuel isolator | Tool kit and wrap